Monday, June 20, 2011


Saturday, June 18, 2011
Inspired by Safety Eyes =P
Well, the tester dragon that I so lovingly named Guinea is pretty much done, so now I can move on to one that I actually intend on selling. For my first dragon, I was actually inspired by a pair of Sleepy Eyes that I won from Suncatcher Craft Eyes in a Tweet contest last week.

These gorgeous eyes are hand painted by Michelle McLaughlin with non-toxic acrylic paint (Yay for non-toxic!! LOL) and they come in sizes from 4.5mm to 24mm. They really pick up the light beautifully! This is awesome for me because I was having trouble figuring out how to give the eyes more of a presence on the dragons' faces. The Suncatchers definitely give them a little something special, and in the right size!!!! hehe...I'm super excited to be working with them!!
The sleepy eyes are just so adorable I decided to base my dragon's theme around them- I'm going to make a sleepy, bedtime dragon! =D


I found some fun fabric, Wait...why does she need fabric for a amigurumi?? (It's a secret! You'll just have to wait and see ;) and picked up a skein of Caron's Simply Soft (my favorite for making amigurumi!) in Blueberry.
I've been so excited about this dragon that I'm already about a 1/3 done with it. I actually stayed up till 3am last night working on it and only went to sleep because I had to wake up bright and early to let the dogs out.
I can't wait to show you the finished dragon!!! =D
Wednesday, June 15, 2011
WIP Squirrel, Dragons and Polymer Clay!
This past week I've been working on a few different projects at once. Yes, I'm guilty of starting way too many projects at once, but what crafter isn't?


Squirrel
I've actually been working on this squirrel for awhile now and am just starting to see the light at the end of the tunnel. The pattern is by Pixiekitten and super easy to follow, but it's definitely not a quick project. Adding fur to the tail is the most time consuming, but also the most rewarding. I'm so excited about how well it's coming out!

Mini-dragon
After working on the large dragon head for so long, I needed something that would lend me a little instant gratification. So I started on a smaller dragon with the same general puffy cheeked look in mind. What's really unique about what I'm doing with this one is that the horn at the top is actually made out of polymer clay, an idea I got from Kathleen of A Surprise Every Time. I think that in future mini-drags I'm going to make the horn a bit wider and less pointy at the top. My husband also gave me the idea of having a little lopsided tooth coming out from the mouth, which I'm definitely planning on adding as well. Now, obviously, these mini's are not ment for children. Not only do they have small pieces, but they also have sharp objects...so, the upside to this is I have a whole lot more freedom in decorating them. Lets see how gaudy I can make 'em ;)
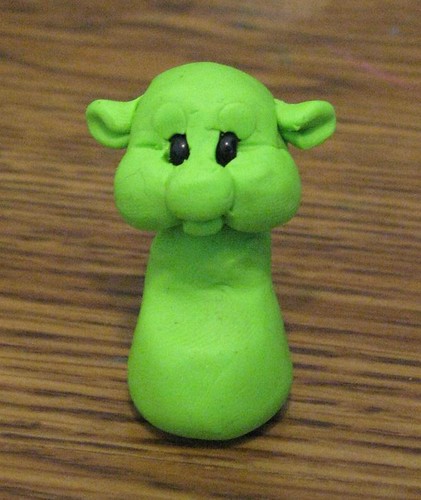
More polymer clay play
So I don't get too burnt out on crocheting all the time, I decided to have a side project just for fun. My first attempt at making a figurine with clay is...have your guessed? Yup! Another dragon (have you caught on to my obsession with them yet?)! So far I think this little guy looks more like a baby Shrek though :P
For more Work-In-Progress fun, check out
Thursday, June 9, 2011
5 Ways to Give Your Amigurumi Eyes

There are several options for adding eyes to your amigurumi, each giving your ami a different look.
1. Safety Eyes-
1. Safety Eyes-
Probably the most popular and easiest method to give your ami eyes is to pop in some safety eyes. To use them, you simply push the rod that's attached to the back of it through your material and attach the locking back to secure it in place.
Safety eyes come in all different shapes, sizes and colors. You can generally buy basic ones at your local craft store, or you can get a bit more fancy and buy hand painted safety eyes. A few ami-artists even make their own!
2. Buttons-
Another easy attach-and-go option is to use buttons. Although buttons aren't used nearly as much as safety eyes, they can give your ami a unique and almost "antiqued" look. You can also have a lot of fun pairing up different colors and sizes to make your ami a bit wacky :P
3. Crocheted-
If you don't feel like investing in any extra materials, you could always crochet the eyes for your ami (like the picture above). You could simply make a few circle and stitch them together or make them a bit more detailed like April Draven's Dreamy the Blue Dragon. :)
4. Felt-
Another economic option would be to cut the shapes you want out of felt and glue or stitch them onto the face. This method also gives a bit more of a flatter and "googly" look.
5. Embroidery-
If you want a smoother, threaded look you may want to try embroidering the eyes directly onto the crocheted surface. I recommend using the Satin Stitch or a French Knot for smaller amigurumi that just need a dot for the eye. Here's a really good embroidery index.

Adding Detail
Whether it's stitching in a bit of "glare" to an embroidered or felted eye or giving the area around the eye a bit of flair and decoration, adding detail to your amigurumi's eyes can really enhance the look of it dramatically. A wonderful example is GourmetAmigurumi's dolls. I highly recommend checking out her work. It's truly amazing!!
What's your favorite method for giving your amigurumi eyes? Do you do anything special to make them unique?
Tuesday, June 7, 2011
Dragon Head Complete!
Well, I finally finished my dragon's head...He doesn't have a face yet, but lets take one thing at a time.
The head takes on a nice round shape with a short cute snout and puffy cheeks. I'm extremely proud of those cheeks. Partially because they were such a pain to figure out! All in all, it took me about 3 days to figure out exactly how shape everything and get it placed on the head in the right spot (I'm determined to make the design seamless). There's also a small hole in the bottom where I'll be connecting the neck with sc, and then continuing onto the body :)

For more Work-In-Progress Projects head on over to:
Monday, June 6, 2011
Build a Better Blog Challenge
I was browsing around Tip Junkie this morning and found this awesome post Ways to Improve your Blog--Challenge.
The SITS Girls are hosting the challenge based on Problogger's Ebook 31 Days To Build a Better Blog. Here's a quick outline of what they'll be doing.
I've been searching for a community like this for awhile now! If you end up joining the challenge, or just joining the forums at SITS, be sure to find me (I just joined myself Username: AmiAllen) and maybe we can even team up for the challenge :D
Sunday, June 5, 2011
Sunday Sketches
I ended up revamping the baby dragon design a bit from my last post.
Once I actually started forming the amigurumi, it just wasn't turning out much like I had imagined.
So, I'm trying a slightly different approach for a better look, as well as shaping the ami a bit easier :)
New and improved sketches:


Subscribe to:
Posts (Atom)